Introduction
Creating a professional and appealing website for your service-based business is crucial for attracting and retaining clients. In this guide, I’ll walk you through the steps to design your website using WordPress and Elementor, utilizing the Sydney Pro 2 theme from AppThemes.
Step 1: Set Up WordPress
- Install WordPress: Begin by installing WordPress on your hosting provider. Most hosts offer a one-click installation process.
- Log In: Once WordPress is installed, log in to your WordPress dashboard.
Step 2: Install and Activate Sydney Pro 2 Theme
- Download Theme: If you haven’t already, download the Sydney Pro 2 theme from AppThemes.
- Upload Theme:
- Go to your WordPress dashboard.
- Navigate to
Appearance>Themes. - Click on
Add Newand thenUpload Theme. - Choose the Sydney Pro 2 theme file from your computer and click
Install Now.
- Activate Theme: Once the theme is installed, click
Activate.
Step 3: Import a Starter Site
- Navigate to Starter Sites:
- Go to
Appearance>Themes. - Click on
Starter Sites.
- Go to
- Choose a Starter Site: Browse through the available starter sites and select one that suits your business. Import the chosen starter site.
- Install Required Plugins: During the import process, you’ll be prompted to install necessary plugins such as Elementor. Install and activate these plugins.
Step 4: Customize with Elementor
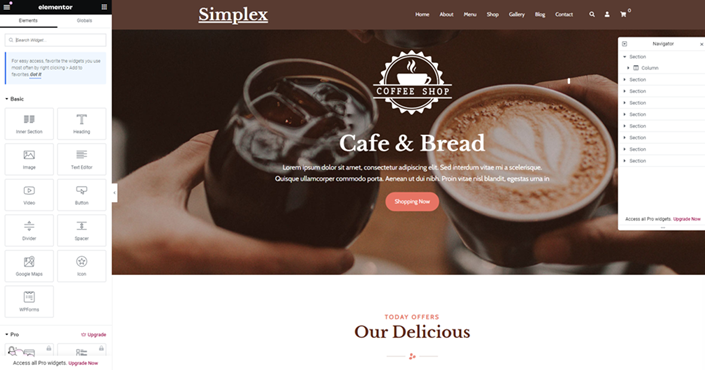
- Open Elementor: Go to a page you want to edit and click
Edit with Elementor. - Add and Customize Sections:
- Click the
Add New Sectionbutton. - Choose the structure of your section (e.g., single column, two columns).
- Click the
- Add Widgets:
- Drag and drop widgets from the Elementor panel to your section (e.g., Heading, Text Editor, Button).
- Customize Widgets:
- Click on a widget to edit its content and style.
- Adjust typography, color, alignment, and more under the
Styletab.
Step 5: Customize the Theme’s Design
- Set Background Colors:
- Select a section and go to the
Styletab. - Under
Background, choose a background color or image.
- Select a section and go to the
- Style Text:
- Select a text widget and go to the
Styletab. - Under
Typography, choose your font, size, and color.
- Select a text widget and go to the
- Add and Style Buttons:
- Drag a Button widget to your section.
- Under
Content, set the button text (e.g., “Let’s Get Started”). - Under
Style, adjust the button’s color, typography, and border radius.
Step 6: Add Images
- Upload Images:
- In Elementor, add an Image widget to your section.
- Click
Choose Imageand upload your desired image from your computer.
- Position and Size Images:
- Adjust the image’s size and position under the
Styletab. - Use the margin and padding settings to position the image precisely.
- Adjust the image’s size and position under the
Step 7: Final Adjustments and Review
- Preview Your Site:
- Click the
Previewbutton to see how your site looks.
- Click the
- Make Adjustments:
- Return to Elementor to make any necessary adjustments to the layout, content, or styling.
- Publish:
- Once satisfied, click the
Publishbutton to make your site live.
- Once satisfied, click the
Conclusion
Designing a service-based website with WordPress and Elementor is straightforward and efficient, especially with a powerful theme like Sydney Pro 2. By following these steps, you can create a professional website that effectively showcases your services and attracts potential clients. Happy designing!

